
Introduction
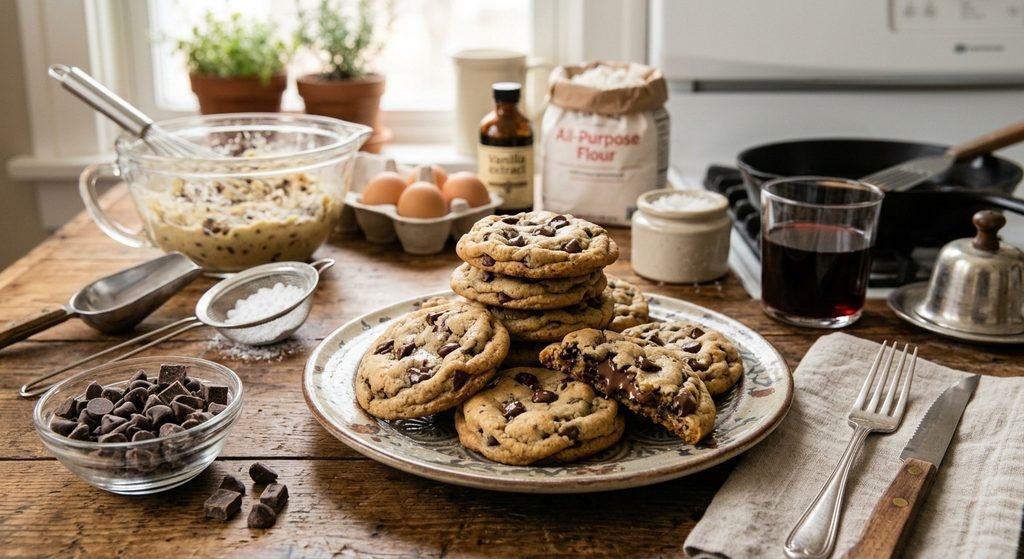
There is something special about freshly baked chocolate chip cookies. Their sweet aroma fills the kitchen, their edges turn beautifully golden, and every bite delivers a delicious combination of buttery dough and melted chocolate. Whether you enjoy them with a glass of cold milk, serve them after dinner, or prepare them for a family gathering, homemade chocolate chip cookies are always a wonderful treat.
The best part is that you do not need expensive ingredients or professional baking equipment to make delicious cookies at home. With a few simple pantry ingredients and the right baking technique, you can prepare cookies that taste just as good as those from your favorite bakery.
This easy homemade chocolate chip cookies recipe is designed for beginners and experienced home bakers alike. The cookies have lightly crisp edges, soft and chewy centers, and plenty of chocolate chips throughout. You can also customize the recipe by using dark chocolate, milk chocolate, chopped chocolate bars, or even nuts.
In this guide, you will learn how to prepare the cookie dough, measure ingredients correctly, achieve the perfect texture, avoid common baking mistakes, and store your cookies so they stay fresh.
If you have been searching for a reliable chocolate chip cookie recipe that is simple, delicious, and easy to follow, this is a great recipe to add to your baking collection.
Why You Will Love This Chocolate Chip Cookies Recipe
There are many reasons to make chocolate chip cookies at home. First, the ingredients are affordable and easy to find. You probably already have most of them in your kitchen.
Here are some reasons this recipe is worth trying:
- Easy preparation: You do not need complicated techniques or special baking skills.
- Simple ingredients: The recipe uses everyday baking ingredients.
- Soft and chewy texture: The combination of brown sugar and white sugar helps create a satisfying texture.
- Rich chocolate flavor: Every cookie contains delicious chocolate chips.
- Customizable: You can use different types of chocolate and add your favorite toppings.
- Perfect for sharing: These cookies are great for parties, lunchboxes, holidays, and family gatherings.
- Make-ahead friendly: You can prepare the dough in advance and bake it later.
Homemade cookies also give you control over the ingredients. You can adjust the sweetness, choose your favorite chocolate, and make smaller or larger cookies depending on your preference.
Ingredients for Homemade Chocolate Chip Cookies
The secret to delicious cookies is using the correct balance of ingredients. Each ingredient plays an important role in the final flavor and texture.
Main Ingredients
- 2 1/4 cups all-purpose flour: Provides structure and helps the cookies hold their shape.
- 1 teaspoon baking soda: Helps the cookies rise and spread during baking.
- 1/2 teaspoon salt: Balances the sweetness and enhances the overall flavor.
- 3/4 cup unsalted butter, softened: Adds richness and creates a tender texture.
- 3/4 cup packed brown sugar: Adds moisture, a subtle caramel flavor, and chewiness.
- 1/2 cup granulated white sugar: Helps create lightly crisp edges.
- 1 large egg: Binds the ingredients and provides structure.
- 1 teaspoon vanilla extract: Adds a warm, sweet aroma and improves the flavor.
- 2 cups semisweet chocolate chips: Provide rich chocolate flavor in every bite.
Optional Ingredients
You can also add:
- 1/2 cup chopped walnuts or pecans
- 1/4 cup dark chocolate chunks
- A small pinch of flaky sea salt for topping
- 1/2 teaspoon cinnamon for a warm flavor
- Extra chocolate chips to decorate the cookies before baking
For the best results, use room-temperature butter that is soft enough to press with a finger but not melted. Melted butter can cause the cookies to spread more than expected.
Equipment You Will Need
You do not need professional baking equipment to prepare this recipe. Basic kitchen tools are enough.
- Large mixing bowl
- Medium mixing bowl
- Measuring cups and spoons
- Whisk
- Electric hand mixer or wooden spoon
- Rubber spatula
- Baking sheets
- Parchment paper
- Cookie scoop or tablespoon
- Cooling rack
Parchment paper is especially helpful because it prevents sticking and makes cleanup easier. If you do not have parchment paper, you can lightly grease your baking sheet.
Preparation and Cooking Time
| Detail | Time |
|---|---|
| Preparation time | 15 minutes |
| Optional chilling time | 30 minutes |
| Cooking time | 10–12 minutes |
| Cooling time | 10 minutes |
| Total time without chilling | Approximately 35 minutes |
| Total time with chilling | Approximately 65 minutes |
| Yield | About 24 cookies |
The exact number of cookies depends on how much dough you use for each portion.
Step-by-Step Instructions
Follow these simple steps to make delicious homemade chocolate chip cookies.
Step 1: Preheat the Oven
Preheat your oven to 350°F (175°C). Allow the oven to reach the correct temperature before placing the cookies inside.
Prepare two baking sheets by lining them with parchment paper. This helps prevent the cookie dough from sticking and allows the cookies to bake more evenly.
If you are using only one baking sheet, allow it to cool between batches. Placing fresh cookie dough on a hot baking sheet can cause the cookies to spread too quickly.
Step 2: Mix the Dry Ingredients
Take a medium-sized mixing bowl and add the all-purpose flour, baking soda, and salt.
Whisk the ingredients together until they are evenly combined. This step distributes the baking soda and salt throughout the flour.
Set the bowl aside while you prepare the butter and sugar mixture.
Mixing the dry ingredients separately helps prevent concentrated pockets of baking soda in the finished cookies.
Step 3: Cream the Butter and Sugars
Place the softened butter in a large mixing bowl.
Add the packed brown sugar and granulated white sugar. Using an electric mixer, beat the ingredients together for approximately 2–3 minutes until the mixture looks creamy and smooth.
If you do not have an electric mixer, you can use a wooden spoon or sturdy spatula. It may take a little longer, but the results can still be delicious.
Do not use hot or completely melted butter. Properly softened butter helps create a balanced cookie texture.
Step 4: Add the Egg and Vanilla
Add one large egg to the butter and sugar mixture.
Pour in the vanilla extract and mix until everything is combined. Scrape down the sides of the bowl with a spatula if necessary.
The mixture should look smooth and creamy. Avoid mixing for too long after adding the egg.
Step 5: Combine the Wet and Dry Ingredients
Gradually add the dry ingredient mixture to the wet mixture.
Mix on low speed or stir gently with a spatula until the flour is mostly incorporated.
Do not overmix the dough. Excessive mixing can develop too much gluten, which may make the cookies tougher rather than soft and tender.
Stop mixing once you no longer see large patches of dry flour.
Step 6: Add the Chocolate Chips
Add the semisweet chocolate chips to the cookie dough.
Use a spatula to fold them in gently so that the chocolate is distributed throughout the mixture.
If you want bakery-style cookies, reserve a small handful of chocolate chips. Press a few onto the top of each dough ball before baking.
You can also combine semisweet chocolate chips with dark chocolate chunks for a richer chocolate flavor.
Step 7: Chill the Dough (Recommended)
Cover the bowl with plastic wrap or a suitable lid and place it in the refrigerator for approximately 30 minutes.
Chilling is optional, but it can improve the flavor and help reduce excessive spreading.
The butter becomes firmer as the dough chills, helping the cookies maintain a thicker shape during baking. The resting period also allows the ingredients to develop a more balanced flavor.
If you prefer thinner cookies, you can bake the dough without chilling. However, if your kitchen is warm or your dough feels very soft, chilling is especially helpful.
Step 8: Shape the Cookie Dough
Remove the dough from the refrigerator.
Use a cookie scoop or tablespoon to divide the dough into approximately 24 portions. Roll each portion gently into a ball.
Place the dough balls on the prepared baking sheet, leaving approximately 2 inches of space between them. The cookies will spread as they bake.
Avoid placing too many dough balls close together because they may merge into one another.
For attractive cookies, press a few extra chocolate chips onto the top of each dough ball.
Step 9: Bake the Cookies
Place the baking sheet in the preheated oven.
Bake for approximately 10–12 minutes, or until the edges are lightly golden and the centers still look slightly soft.
Do not wait until the entire cookie becomes dark brown. Cookies continue cooking for a short time after being removed from the oven because the baking sheet remains hot.
If you prefer softer cookies, remove them when the edges are set but the centers are still slightly underdone.
If you prefer crispier cookies, leave them in the oven for an additional minute or two while watching carefully to prevent burning.
Step 10: Let the Cookies Cool
Remove the baking sheet from the oven and allow the cookies to rest for approximately 5 minutes.
They will be delicate immediately after baking, so avoid moving them too soon.
After a few minutes, transfer the cookies to a cooling rack using a spatula.
Allow them to cool for another 5–10 minutes before serving.
For an extra bakery-style finish, sprinkle a tiny amount of flaky sea salt over the warm cookies.
Your homemade chocolate chip cookies are now ready to enjoy!
Tips for Perfect Chocolate Chip Cookies
Even a simple cookie recipe can produce different results depending on how the ingredients are measured and handled. These tips will help you achieve delicious cookies consistently.
1. Measure Flour Correctly
Too much flour can make cookies dry, thick, and crumbly.
For the most accurate results, use a kitchen scale. If you are using measuring cups, spoon the flour into the cup and level it with a straight edge.
Do not press the flour down into the measuring cup.
2. Use Softened Butter
Butter should be soft but not melted. When you press it gently with your finger, it should leave a small indentation.
Very cold butter is difficult to cream with sugar, while melted butter can make the dough spread too much.
3. Use Both Brown and White Sugar
Brown sugar adds moisture and a caramel-like flavor. White sugar helps create crisp edges.
Using both gives the cookies a balanced combination of softness and light crispness.
4. Avoid Overmixing
Once the flour is added, mix only until the ingredients are combined.
Overmixing can make the cookies tougher and less tender.
5. Chill the Dough When Needed
Chilling helps firm the butter and can prevent excessive spreading.
It also gives the flour time to absorb moisture, which can improve the finished texture.
6. Do Not Overbake
One of the most common cookie mistakes is leaving them in the oven until the centers look completely firm.
The centers should still look slightly soft when you remove the cookies. They will continue to set while cooling.
7. Use an Oven Thermometer
Some ovens run hotter or cooler than their displayed temperature.
An inexpensive oven thermometer can help you check the actual temperature and improve baking consistency.
Common Mistakes to Avoid
If your chocolate chip cookies do not turn out as expected, one of these mistakes may be responsible.
Using melted butter: Melted butter can cause excessive spreading and thinner cookies. Use softened butter instead.
Adding too much flour: Too much flour creates a dry dough and dense cookies. Measure carefully.
Skipping the spacing: Cookies need enough room to spread. Leave approximately 2 inches between dough portions.
Overmixing the dough: Excessive mixing can make the finished cookies tough.
Baking at the wrong temperature: An oven that is too hot can burn the edges before the centers cook properly.
Using an already-hot baking sheet: A warm baking sheet can cause the next batch to spread too quickly.
Removing cookies too late: Cookies become harder and crispier as they cool. Remove them when the edges are set and lightly golden.
Delicious Variations to Try
One of the best things about chocolate chip cookies is how easy they are to customize.
Double Chocolate Chip Cookies
For an extra chocolatey version, replace approximately 1/4 cup of the flour with unsweetened cocoa powder.
You can also add dark chocolate chips along with the semisweet chocolate chips.
Chocolate Chip Walnut Cookies
Add 1/2 cup of chopped walnuts to the dough.
Walnuts provide a pleasant crunch and a slightly earthy flavor that pairs beautifully with chocolate.
Sea Salt Chocolate Chip Cookies
After baking, sprinkle a small amount of flaky sea salt over the warm cookies.
The salt balances the sweetness and makes the chocolate flavor stand out.
Peanut Butter Chocolate Chip Cookies
Add approximately 1/3 cup of creamy peanut butter to the butter mixture. You may need to adjust the flour slightly if the dough becomes too soft.
Peanut butter creates a rich, nutty flavor that works especially well with semisweet chocolate.
Milk Chocolate Chip Cookies
Replace the semisweet chocolate chips with milk chocolate chips for a sweeter and creamier result.
This version is especially popular with children and anyone who prefers a milder chocolate flavor.
Holiday Chocolate Chip Cookies
Add colorful baking sprinkles or seasonal chocolate candies to the dough.
You can prepare these cookies for Christmas, birthdays, school celebrations, and other special occasions.
How to Store Homemade Chocolate Chip Cookies
Proper storage helps your cookies stay fresh and delicious.
At Room Temperature
Allow the cookies to cool completely before storing them.
Place them in an airtight container and keep the container in a cool, dry place.
They generally stay fresh for approximately 4–5 days when stored properly.
Avoid storing warm cookies in a sealed container because trapped steam can make them soggy.
In the Refrigerator
You can refrigerate baked cookies in an airtight container, although refrigeration is usually unnecessary for short-term storage.
If you do refrigerate them, allow the cookies to come closer to room temperature before serving for a softer texture.
In the Freezer
Chocolate chip cookies freeze well.
Allow them to cool completely, then place them in a freezer-safe container or bag. Separate layers with parchment paper if necessary.
They can generally be frozen for up to 2–3 months for good quality.
Thaw the cookies at room temperature before serving.
How to Freeze Chocolate Chip Cookie Dough
Freezing the dough is a convenient way to enjoy freshly baked cookies whenever you want.
Prepare the dough according to the recipe, then divide it into individual portions.
Place the dough balls on a parchment-lined tray and freeze until firm. Transfer the frozen portions to a freezer-safe bag or container.
Label the container with the date and baking instructions.
For best quality, use frozen cookie dough within approximately 2–3 months.
You can often bake the dough directly from frozen. Add a little extra baking time and check that the edges are set and lightly golden.
What to Serve with Chocolate Chip Cookies
Chocolate chip cookies taste wonderful on their own, but you can make them even more enjoyable by serving them with other treats.
Cold milk: The classic combination. A glass of cold milk balances the sweetness and complements the chocolate.
Hot coffee: Coffee provides a slightly bitter contrast to the sweet cookies.
Hot chocolate: Serve cookies with a warm mug of hot chocolate for a comforting dessert.
Vanilla ice cream: Place a scoop of vanilla ice cream between two cookies to make an easy ice cream sandwich.
Fresh strawberries: Fresh fruit adds a refreshing contrast to the rich cookie flavor.
Whipped cream: Serve warm cookies with a small spoonful of whipped cream for a simple dessert presentation.
These cookies are also excellent additions to dessert platters, birthday celebrations, holiday tables, and homemade gift boxes.
Frequently Asked Questions
1. Why Did My Chocolate Chip Cookies Spread Too Much?
Cookies may spread too much if the butter is melted, the dough is too warm, or the flour has been measured incorrectly.
Try chilling the dough for 30 minutes before baking. Also, make sure your baking sheet is completely cool before adding another batch.
2. How Do I Make My Cookies Soft and Chewy?
Use a combination of brown sugar and white sugar, avoid overmixing the dough, and do not overbake the cookies.
Remove them when the edges are lightly golden and the centers still look slightly soft.
3. Can I Make Chocolate Chip Cookies Without an Electric Mixer?
Yes. You can mix the butter and sugar using a sturdy wooden spoon or spatula.
Make sure the butter is properly softened so it is easier to combine with the sugar.
4. Can I Use Salted Butter Instead of Unsalted Butter?
Yes. Salted butter can be used, but reduce or omit the additional salt in the recipe depending on how salty your butter is.
5. Can I Use Different Types of Chocolate?
Absolutely. You can use milk chocolate, dark chocolate, white chocolate, or a combination.
Chopped chocolate bars also work well and create attractive melted chocolate pockets.
6. Do I Have to Chill the Cookie Dough?
No. Chilling is optional.
However, it can improve flavor and help prevent excessive spreading. If your dough feels very soft, chilling is recommended.
7. How Can I Tell When the Cookies Are Done?
Look for lightly golden edges and centers that appear slightly soft.
The cookies will continue setting as they cool on the baking sheet.
8. Why Are My Cookies Hard After Cooling?
Cookies can become hard if they are overbaked or contain too much flour.
Next time, measure the flour carefully and remove the cookies when their edges are set but the centers are still soft.
9. Can I Make the Dough Ahead of Time?
Yes. You can cover the dough and refrigerate it before baking.
For the best quality, use refrigerated dough within approximately 1–2 days and keep it properly covered.
10. Can I Make Smaller or Larger Cookies?
Yes. Simply adjust the amount of dough used for each cookie.
Smaller cookies usually require less baking time, while larger cookies may need additional time. Watch the edges and centers rather than relying only on the clock.
Nutrition Information
The following values are estimates for one cookie when the recipe makes approximately 24 cookies.
| Nutrient | Estimated Amount |
|---|---|
| Calories | 180 |
| Carbohydrates | 24 g |
| Protein | 2 g |
| Fat | 9 g |
| Saturated Fat | 5 g |
| Sugar | 15 g |
| Sodium | 100 mg |
Actual nutritional values depend on the brands of ingredients used and the size of each cookie.
Conclusion
Making homemade chocolate chip cookies is an easy and rewarding way to enjoy a classic dessert. With simple ingredients, straightforward preparation, and a few helpful baking techniques, you can create cookies with golden edges, soft centers, and plenty of delicious chocolate.
The most important things to remember are to measure the flour correctly, use softened butter, avoid overmixing, and remove the cookies from the oven before they become too dark. Chilling the dough can also help improve the flavor and texture.
Whether you make them for your family, prepare them for a celebration, or simply want something sweet with your afternoon coffee, these homemade chocolate chip cookies are a recipe worth keeping.
Try the recipe, experiment with your favorite chocolate combinations, and enjoy the wonderful taste of freshly baked cookies!
Printable Recipe Card
Easy Homemade Chocolate Chip Cookies
Prep Time: 15 minutes
Chilling Time: 30 minutes (optional)
Cook Time: 10–12 minutes
Total Time: Approximately 35 minutes without chilling
Servings: 24 cookies
Ingredients
- 2 1/4 cups all-purpose flour
- 1 teaspoon baking soda
- 1/2 teaspoon salt
- 3/4 cup unsalted butter, softened
- 3/4 cup packed brown sugar
- 1/2 cup granulated white sugar
- 1 large egg
- 1 teaspoon vanilla extract
- 2 cups semisweet chocolate chips
Instructions
- Preheat the oven to 350°F (175°C) and line baking sheets with parchment paper.
- Whisk together the flour, baking soda, and salt in a medium bowl.
- In a separate large bowl, beat the softened butter, brown sugar, and white sugar until creamy.
- Add the egg and vanilla extract. Mix until combined.
- Gradually add the dry ingredients and mix just until incorporated.
- Fold in the chocolate chips.
- Chill the dough for approximately 30 minutes if desired.
- Scoop the dough into approximately 24 portions and place them 2 inches apart on the baking sheets.
- Bake for 10–12 minutes, until the edges are lightly golden and the centers remain slightly soft.
- Cool on the baking sheet for 5 minutes, then transfer to a cooling rack.
Storage: Keep cooled cookies in an airtight container at room temperature for approximately 4–5 days.
Recipe Tip: Do not overbake. The cookies should look slightly soft in the center when removed from the oven.